We hope you love the products we recommend! Just so you know, Trendy Mami may collect a share of sales or other compensations from the links on this page.
–
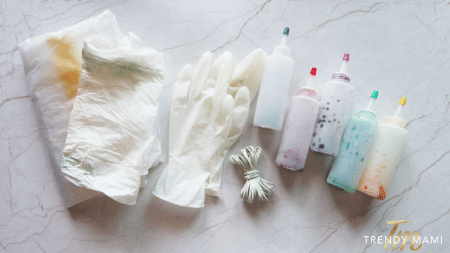
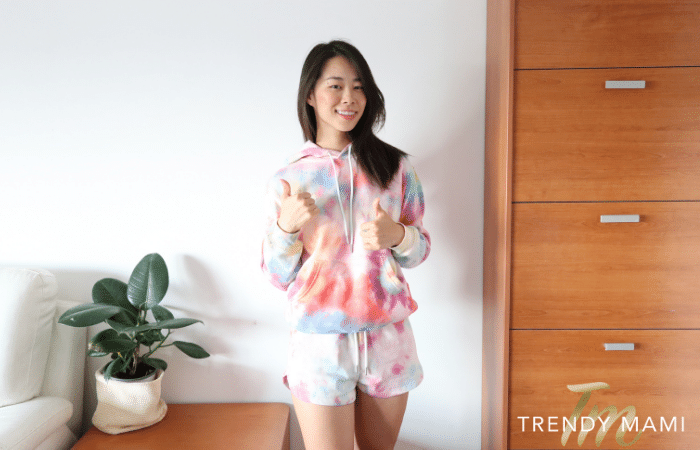
Let’s be real, tie dye shirts are just as American as pickup trucks and football. If you’re wearing tie dye colors, it’s almost impossible to be sad. What’s especially great about tie dye clothes is that you can DIY at home! Wondering how to tie dye? Check out our tie dye tutorial below and find out how to tie dye shirts, shorts from Nordstrom, hoodies, virtually anything! Grab a tie dye kit from Joann’s and some extra white clothes laying around, and you’re set!
Get ready to transform some drab white clothing into a psychedelic masterpiece!

How To Tie Dye 4 Different Ways – Tie Dye Tutorial
1. Swirl Style
- Get a 55 gal size plastic bag from Target or sheet of plastic and lay it over your surface, to prevent any staining.
- Grab your white clothing that you wish to dye (such as a t-shirt) and lay it flat over the plastic.
- Pinch the middle of your clothing and begin to twist until your entire item is twisted.
- Begin to tie 4 rubber bands around your item to ensure it stays twisted and doesn’t unravel whilst dyeing.
- Put on rubber gloves, to avoid getting dye on your skin!
- Take your desired fabric dye and desired color/s and pour over your item of clothing, where the rubber bands are. Joann’s sells liquid fabric dye in a bunch of colors! Be sure to dye the back of your item of clothing for best results.
- Place your item on a rack to let the excess dye drip down.
- Once your item is no longer dripping with dye, place in a plastic bag.
- Let the dye soak for 1-2 hours, however the longer you let the dye soak, the better the results.
- Once you’ve let your item soak for the required time, rinse with the rubber bands still on.
- Remove rubber bands and let dry.
- Voila! Enjoy your tie dyed clothes.
 2. Bullseye Style
- Get a 55 gal size plastic bag or sheet of plastic and lay it over your surface, to prevent any staining.
- Grab your white clothing that you wish to dye (such as a t-shirt) and lay it flat over the plastic.
- Pinch one section of fabric up and tie it off with a rubber band. Repeat this on different sections, as many as you like. The more, the more ‘bullseyes’ of dye your clothing will have.
- Put on rubber gloves, to avoid getting dye on your skin!
- Take your desired fabric dye and desired color/s and pour over your item of clothing, where the rubber bands are. Be sure to dye the back of your item of clothing for best results.
- Place your item on a rack to let the excess dye drip down.
- Once your item is no longer dripping with dye, place in a plastic bag.
- Let the dye soak for 1-2 hours, however the longer you let the dye soak, the better the results.
- Once you’ve let your item soak for the required time, rinse with the rubber bands still on.
- Remove rubber bands and let dry.
- Voila! Enjoy your tie dyed clothes.
 3. Crumple Style
- Get a 55 gal size plastic bag or sheet of plastic and lay it over your surface, to prevent any staining.
- Grab your white clothing that you wish to dye (such as a t-shirt) and lay it flat over the plastic.
- Begin to scrunch your item of clothing up and tie it off with rubber bands.
- Put on rubber gloves, to avoid getting dye on your skin!
- Take your desired fabric dye and desired color/s and pour over your item of clothing, where the rubber bands are. Be sure to dye the back of your item of clothing for best results.
- Place your item on a rack to let the excess dye drip down.
- Once your item is no longer dripping with dye, place in a plastic bag.
- Let the dye soak for 1-2 hours, however the longer you let the dye soak, the better the results.
- Once you’ve let your item soak for the required time, rinse with the rubber bands still on.
- Remove rubber bands and let dry.
- Voila! Enjoy your tie dyed clothes.

4. Stripes Style
- Get a 55 gal size plastic bag or sheet of plastic and lay it over your surface, to prevent any staining.
- Grab your white clothing that you wish to dye (such as a t-shirt) and lay it flat over the plastic.
- Begin to accordion pleat and fold fabric either vertically or horizontally.
- Secure your pleated fabric by using rubber bands, ensuring they are evenly spaced and adding as many as desired. You can space the rubber bands far apart for wider stripes, or close together for thin stripes.
- Put on rubber gloves, to avoid getting dye on your skin!
- Take your desired fabric dye and desired color/s and pour over your item of clothing, where the rubber bands are. Be sure to dye the back of your item of clothing for best results.
- Place your item on a rack to let the excess dye drip down.
- Once your item is no longer dripping with dye, place in a plastic bag.
- Let the dye soak for 1-2 hours, however the longer you let the dye soak, the better the results.
- Once you’ve let your item soak for the required time, rinse with the rubber bands still on.
- Remove rubber bands and let dry.
- Voila! Enjoy your tie dyed clothes.
We hope you enjoyed our article on how to tie dye at home! This is the perfect quarantine activity if you’re feeling crafty and have a few boring white tees around. After learning how to tie dye shirts, grab those sweats lying around and jazz them up.
If you did enjoy this read, check out our other articles like DIY Giant Chunky Knit Blanket and Macrame Coasters DIY – Perfect For Summer Decor! Don’t forget Halloween is coming up and that is a great excuse to get crafty! Checkout our DIY Halloween Costume Ideas for Your Little One.


