We hope you love the products we recommend! Just so you know, Trendy Mami may collect a share of sales or other compensations from the links on this page.
–
Everybody seems to be talking about Gua Sha lately, but what is it, and what are the benefits? With this Gua Sha Tutorial we’ll cover everything you need to know.
Pain and tension are no match for this relaxing and rejuvenating Gua Sha therapy for your neck and face. For just a few minutes each day, you can ease muscle tension while promoting cell growth for younger, healthier skin.
In the search for young, healthy skin, it’s easy to spend hundreds of dollars on pricy moisturizers, luxury serums, and age-defying creams. However, one of the easiest and most affordable ways to maintain great skin is through the practice of Gua Sha. This type of facial massage dates back to ancient China and has been used for hundreds of years to stimulate blood circulation and promote natural drainage of the body’s lymph nodes. It uses a small, handheld board that opens up your blood vessels in your face and neck, which helps with cell rejuvenating and muscle tension.
Looking for great skincare that has awesome ingredients and benefits? Check out Honeyskin, skincare made with real, organic manuka honey. Manuka honey is known for its incredible antibacterial benefits and is rich in antioxidants as well. Honeyskin has a great selection of face, body, and hair care.
Let’s start off the Gua Sha Tutorial saying that for the best Gua Sha benefits, it’s recommended to give yourself a massage twice a day (once in the morning and once at night). However, you’ll still see results and feel tension relief even if you only use it every other day.
Gua Sha Tutorial – Gua Sha Boards
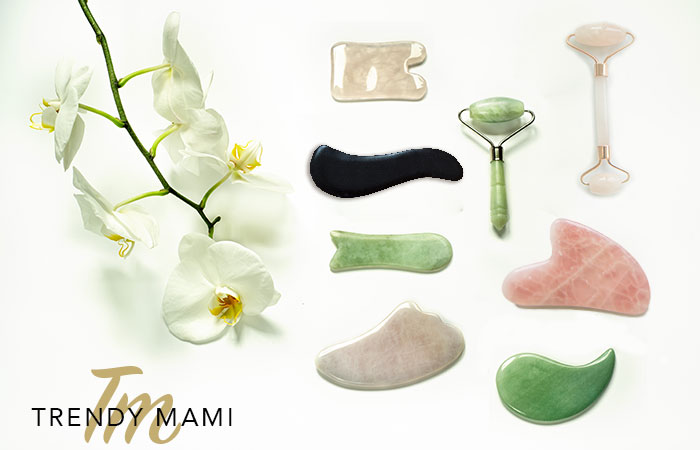
There are many different types of Gua Sha boards available on the market today. However, we believe these are the best materials to look for:
- Buffalo Horn: promotes blood circulation and removes blood stasis
- Jade: relaxes and absorbs body heat which aids in soothing inflamed areas
- Rose Quartz: opens up the heart chakra and enhances self-love and compassion
You may also find that Gua Sha boards come in several shapes as well. Each one has a unique function that targets different areas and skin concerns:
- Teardrop: has a long smooth edge and ridges on the end. It can be easily used on the face or shoulders, arms, and even legs.
- Heart: has a deeper ridge that adds extra pressure to places like your jawline and forehead. It can also be used to ease tension on the hands.
- Wave: has several different areas for ridges which can be used to provide different levels of pressure.
Gua Sha Tutorial – How to Massage with a Gua Sha Board
Gua Sha Massage – The Neck
- To get the most out of this Gua Sha tutorial, make sure your face is recently washed and dry. Feel free to prep your skin with whichever moisturizers or serums you usually use for your everyday skincare routine.
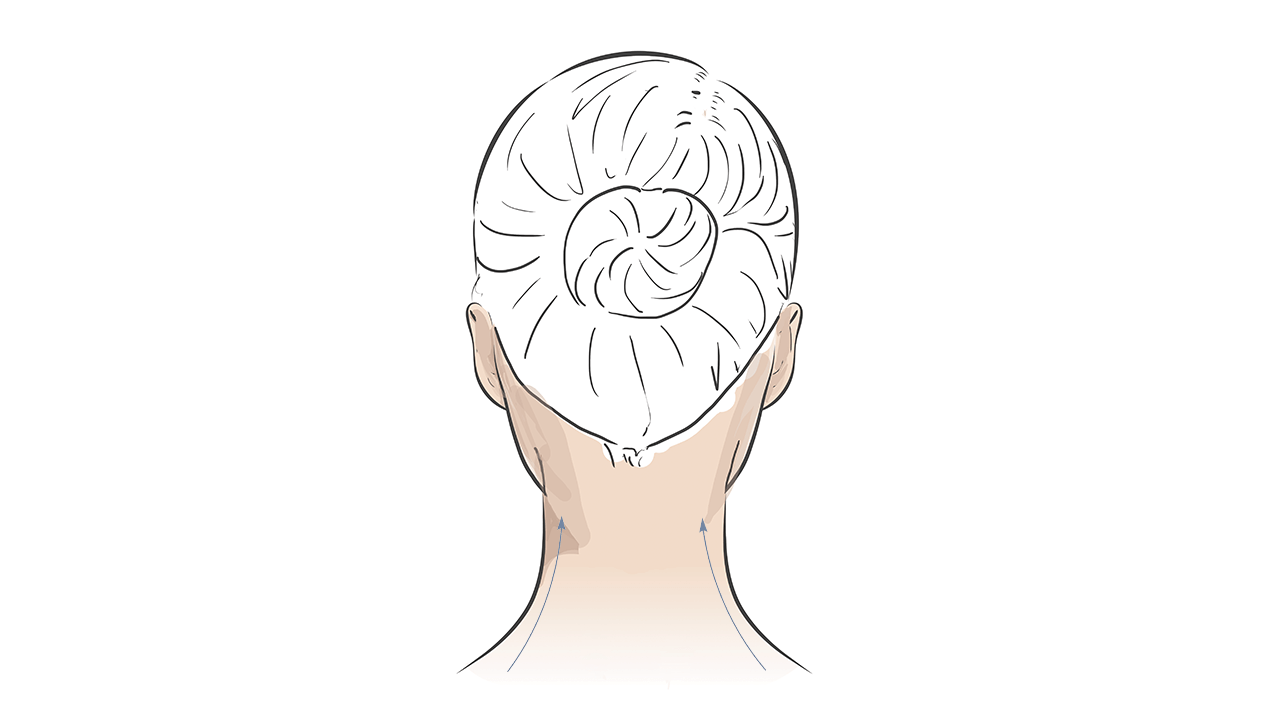
- We will start the Gua Sha tutorial on your upper back and shoulders. Take the Gua Sha board and place the arched side on a 45° angle at your neck towards your ear. Placing a slight pressure on your skin, move the board down your neck towards your shoulder. You can repeat this motion several times.
- Now take the ridged side of the Gua Sha and place it at the nape of your neck along your spine. Move the board up towards the base of your scalp. This is a sensitive spot, so be gentle with your pressure, although you can always press harder if you need more tension relief.
- Place the board on the top part of your shoulder. Move it up towards your ear, giving it a little wiggle at the end using the ridged part for added pressure.
- Let’s move on to massage the front side of the neck. Place the Gua Sha near your collarbone and roll it upwards towards your chin. Repeat this motion on both sides of your neck.
Gua Sha Massage – The Face
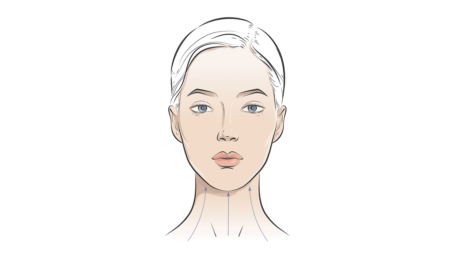
- Next, we’ll use the Gua Sha board on our face to stimulate cell growth. Place the ridged edge on your chin, moving it in circles for a few seconds.
- Now, hold your finger on this point of your chin and move the board outwards along the edge of your jawline towards your ear. Repeat this upwards motion for several seconds and then switch sides and glide the board along your other jawline.
- We can massage the cheeks by placing the ridge of the board next to the nose. Place a slight pressure with your finger on the other side of your nose, and glide the board under your eye and up towards your temple. Repeat on the other side.
- The last exercise will be for your forehead. Rest your finger in between your eyebrows and place the Gua Sha ridges over one brow. Now move the board out towards your temple, tracing the bowed shape of your brow.
- You can also massage upwards from the center of your eyebrows towards your hairline to cover your entire forehead.
Gua Sha Benefits
Although this Gua Sha practice won’t solve all your skin problems, it is a relaxing way to promote cell turnover and blood flow while also relieving any muscle tension you have stored in your face, neck, or shoulders. And it only takes a few minutes a day, so you have no excuse not to start working your way towards younger, healthier skin!
For more skincare inspiration, try our easy homemade face scrub tutorial or our DIY dark spot and acre scar treatment cream.
