We hope you love the products we recommend! Just so you know, Trendy Mami may collect a share of sales or other compensations from the links on this page.
–
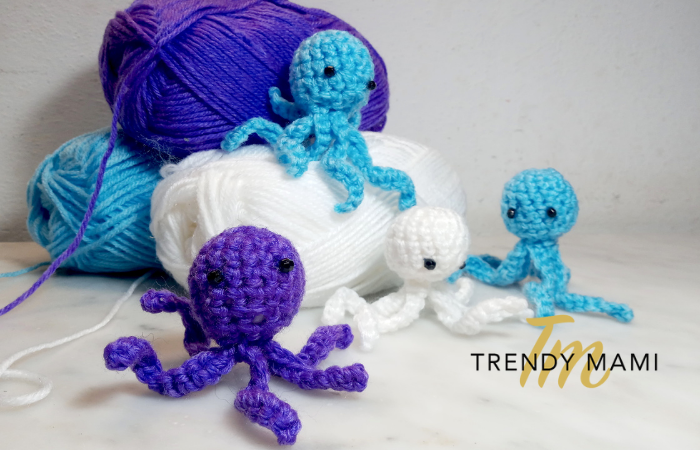
How adorable is this baby octopus? He’s soft, cute, and the perfect companion for the little ones in your family! Not to mention, he’s super easy to make, even for beginners, and our video gives you a step-by-step sequence of how to make a single crochet. Therefore, even if you’ve never crocheted before, you can still learn how to make toys using this simple DIY tutorial.
Before you start making the cutest toys, do check Joann Stores,To inspire the creative spirit in each of us.You can find all kinds of fabric to make toys for your kids.
DIY Crochet Stuffed Toy for Kids
Here are the step-by-step instructions on how to make your very own crocheted octopus. Also, we’ve provided a video walkthrough in case you need extra help with the different types of crochet stitches.
Materials:
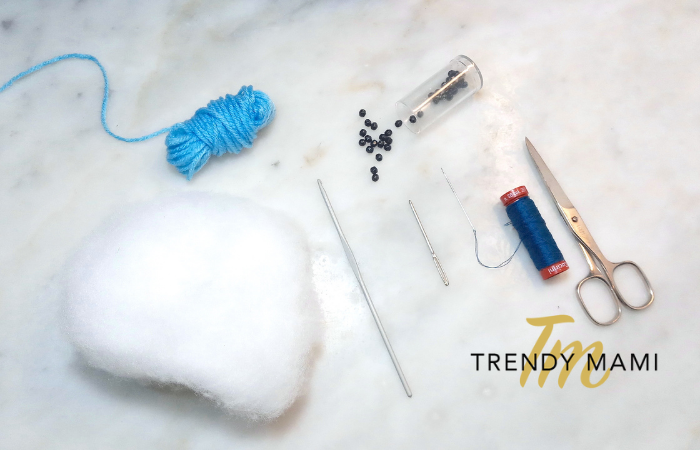
- Poly-fil stuffing
- 7oz (20gr) acrylic yarn 3 ply
- 3/3.5 mm hook (we like this one from Target)
- Yarn needle
- Beads for eyes (or buttons)
- Classic yarn or thread (like this one from Target)
- Scissors
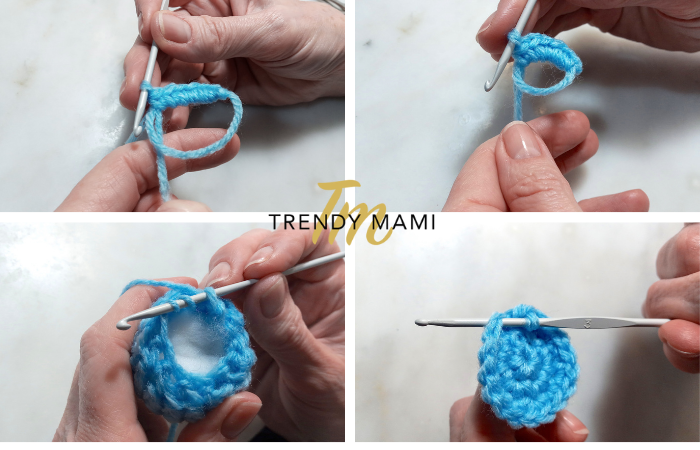
First Stage
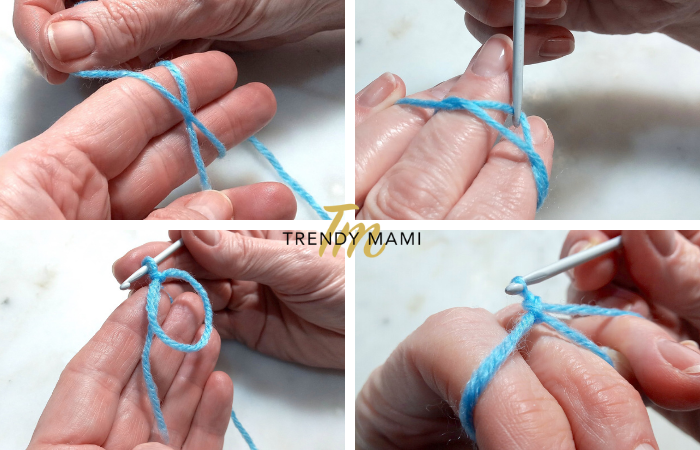
- Wrap the yarn around your index and middle finger to make an X shape. On the backside, insert the hook underneath the first loop and grab the second loop. Then twist and pull this strand over the other piece and pull it through the loop.
2. To make the first row, you will make six single crochets around the ring.
3. Pull the yarn tail to close the magic ring.
4. For the second row, you’ll need to make one increase in each stitch, which means we will do two single crochets in each stitch. Now, do this around the entire ring until you have completed 12 stitches (two in each of the six stitches).
5. The third row will have another one stitch increase, so there should be 18 stitches in total for that round.
6. For the fourth row, you will make one single crochet in each stitch. That will be 18 single stitches in each row.
7. Continue with 18 stitches for the fifth and sixth rows.
8. The sixth row is the widest part of the head. We will now decrease the stitches for the seventh row. Use only the front loop of the first two stitches, then yarn over and pull through both hoops. Your next stitch will be a single crochet, and the next will be the decrease stitch using only the front loop for the next two stitches.
9. Repeat until you have a total of 12 stitches for the seventh row.
Second Stage
10. By now, you should see the shape of the octopus’ head. Stuff the inside of the head with as much poly-fil as you can fit.
11. Similar to the seventh row, we will now make the eighth row with one stitch and one decrease for a total of eight stitches.
12. Row nine will be the start of the tentacles. Using the front loops only, make one slip stitch in the first stitch.
13. After the first stitch, crochet 15 chains.
14. Slip the first chain and go to the second chain, increasing every chain until you make your way back up the tentacle to the head of the octopus. Now, you just made your first tentacle!
15. Slip the stitch at the base and continue with steps 12 to 14 to make the second tentacle.
16. Repeat steps 12 to 14 until you have eight tentacles in total.
Last Stage
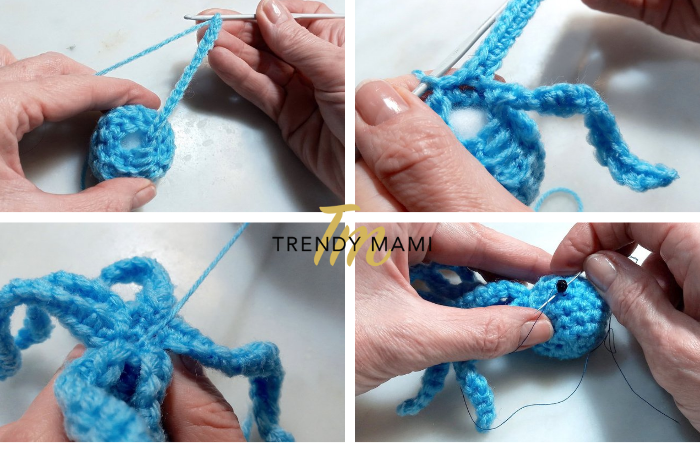
17. To finish, yarn over and pull through the first slip stitch of the first tentacle.
18. Cut the yarn leaving approximately six inches.
19. Pull through the yarn tail.
20. Put the yarn tail through your yarn needle.
21. Close the opening of the octopus by using the back loops of the ninth row.
22. Pull the yarn tail to close the opening tight.
23. Make a few stitches and tighten with a knot to close the opening so that no stuffing pops out of the octopus.
24. Hide the tail and then cut off any excess yarn.
25. To finish, sew the eyes to the head with a needle and thread. We recommend sewing them with four stitches in between each eye. If you have a hard time finding black beads to match, we like these ones from JOANN.
More DIY Projects
That’s it! Now you know how to make toys using a simple crochet technique! Whether you’re making DIY toys for kids or even for yourself, this crocheted octopus is guaranteed to be a fun weekend project! If you’re looking for other crochet tutorials, we have you covered. Try our stylish DIY crochet top or this cozy bear beanie for kids.