We hope you love the products we recommend! Just so you know, Trendy Mami may collect a share of sales or other compensations from the links on this page.
–
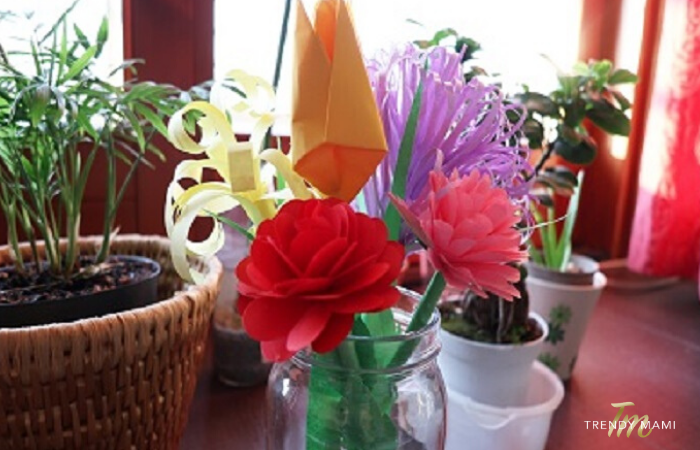
Have a mom, mother-in-law, sister, aunt, or anyone special whom you want to celebrate this Mother’s Day with a beautiful, big bunch of flowers? Every mom deserves flowers on Mother’s Day, which is why these 5 paper flower ideas make for a great Mother’s Day present. Follow along with our tutorial and learn how to make paper flowers for the special mom/s in your life!
If she wants something more artistic, check out Etsy for plenty of amazing creations for a decent price. We also have a great article on the best flower bouquets!
Need art supplies? Be sure to check out JOANN’s as they have lots of arts and crafts materials and sales!
In addition to making beautiful paper flowers for Mother’s Day, consider pairing them with a thoughtful gift from fromyouflowers.com. Their wide selection of bouquets and gifts makes it easy to find the perfect present for any mom. Plus, their same-day delivery option ensures that your gift will arrive in time to make her day special.
Now, let our step by step guide show you how to make the best DIY paper flowers for Mother’s Day!
How to Make Paper Flowers for Mother’s Day
Materials:
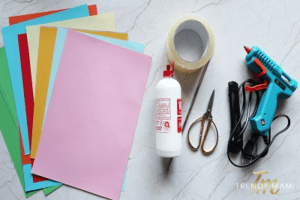
- Colored Paper
- Scissors
- Hot Glue Gun
- Metal Straw or Chopstick
- Tape
1. Chrysanthemum
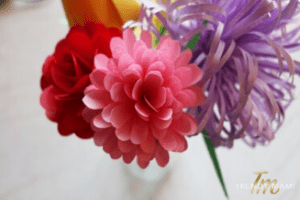
Instructions:
- Ensure you have 6 squares of paper that are 8.5 x 8.5 cm.
- Fold each square into a triangle 3 times.
- Draw 2 bunny ears on the folded paper.
- Take scissors and cut around your bunny ears outline. Then, unfold the paper.
- Using a chopstick, or straw, begin to curl each ‘petal’.
- Repeat with the other 5 squares.
- Remove 1 Corolla.
- Cut the petals as shown in the video.
- Now, using regular glue or a hot glue gun, glue all of your flowers together! Do this by taking the glue and putting a small dollop where you previously cut and sticking it to the full petal beside it. Repeat this with all of your flower pieces.
- Begin to glue your flower pieces one on top of the other, in order from largest to smallest, to form the final chrysanthemum.
- Take a green piece of A4 paper, cut it in half, and wrap one half around a straw or chopstick. Secure the end with a piece of tape and take the chopstick out from the middle.
- Then, cut the bottom of the rolled paper 4 times.
- Taking the other half of your green paper, fold the bottom, and then draw a stencil of half a leaf. Fold the rest of the paper over and cut out your 2 leaves.
- Glue your leaves to your stem, and your flower on top. Voila!
2. Tea Rose
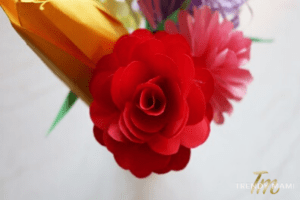
- Ensure you have 6 squares of paper (the ones we used were 6.25 x 6.25 cm, but anything square works just the same!).
- Fold each square into a triangle 3 times.
- Draw an arc on the folded paper.
- Take your scissors and cut around your arc outline. Then, unfold the paper.
- Repeat with the other 5 squares.
- Cut the petals as shown in the video clip.
- Now, begin to glue your flower pieces together, in order from largest to smallest.
- Repeat the steps above for the stem.
- Taking the other half of your paper from earlier, fold the bottom, and then draw a stencil of half a leaf. Fold the rest of the paper over and cut out your 2 leaves.
- Glue your leaves to your stem, and your flower on top. Voila!
3. Lilac
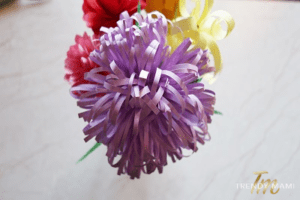
- Take an A4 sheet of paper and fold it in half, vertically.
- Then, fold a crease from the paper’s edge.
- Begin to cut strips perpendicularly to the crease.
- Next, unfold your piece of paper carefully.
- Flip a piece of paper over and using your glue, place glue along the bottom edge, fold up, and glue the edges together.
- Repeat the above steps and replicate another flower.
- Repeat the steps above for the stem.
- Take your hot glue gun and place a strip along the edge. Place your paper stem on the glue and begin to roll the flower around the stem. Securing the last 2 inches of flower with another strip of hot glue and rolling the rest of your flower around the stem.
- Repeat the last step with your other flower, however, position the flower slightly lower than the other.
- Take another A4 sheet of paper and cut it in half. Taking one half of the paper, fold it until it is 1 cm wide.
- Draw out your leaf shape and cut it out.
- Cut 5 leaves off and glue them to the stem, at the base of the flower.
4. Yellow Tail
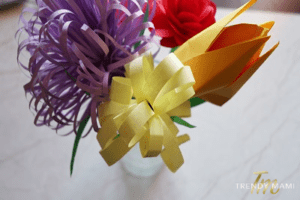
- Take a yellow sheet of A4 paper and fold it in half, vertically.
- Then, fold a crease from the edge. Cut the extra half of the paper off.
- Begin to cut strips perpendicularly to the crease.
- Begin to curl each strip upwards with a straw.
- Repeat the steps from above for the stem.
- Place a dollop of hot glue on the top of the stem and glue down your flower, rolling the edge around the stem. Whilst gluing, begin to go lower each loop around the stem.
- Take another A4 paper piece of paper (but this time green!) and cut it in half. Taking one half of the paper, fold it until it is 1 cm wide.
- Draw out your leaf shape and cut it out.
- Cut 4 leaves off and glue them to the stem, at the base of the flower.
5. Tulip
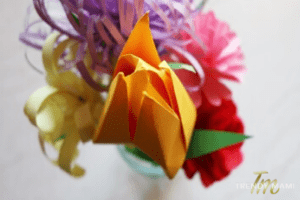
- Create a diagonal crease in a square piece of paper (we used 23 x 23 cm, but smaller works too!)
- Fold the piece of paper in half, horizontally.
- Unfold and refold paper (see video for more detail)
- Then, take both edges and fold to the top. Repeat on the other side.
- Rotate 180⁰ and fold the two sides inwards. Repeat on the other side.
- Begin to blow air in the middle with a straw.
- Repeat the steps above for the stem.
- Take another half of the green paper, fold the bottom, and then draw a stencil of a leaf.
- Fold the rest of the paper over and cut out your 2 leaves.
- Glue your leaves to your stem, and your flower on top. Voila!
Go Beyond Folds and Cuts
We hope you enjoyed our article on how to make paper flowers for Mother’s Day. If you did enjoy our paper flowers tutorial for the special mom in your life this Mother’s Day, why not treat her to some DIY Bath Bombs also?
Enjoy fun DIY activities? Check out our DIY Felt Food tutorial to keep the kids occupied in isolation!

