We hope you love the products we recommend! Just so you know, Trendy Mami may collect a share of sales or other compensations from the links on this page.
–
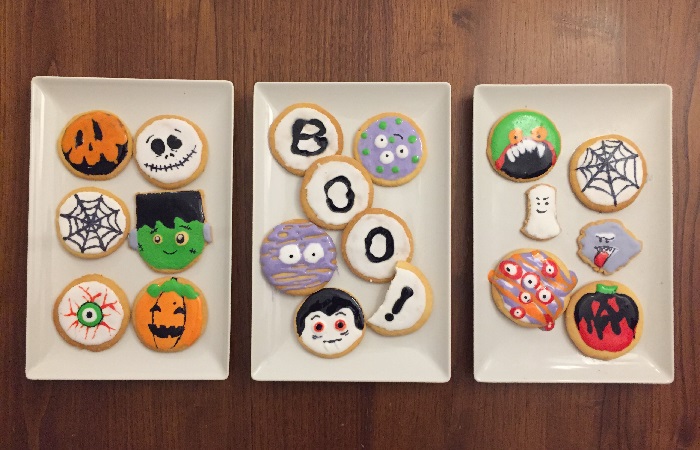
If you’re that mom who tried to give your neighbor’s kids some of “nature’s candy” (raisins) last Halloween and it didn’t go over so well, but you don’t want to be like everyone else and hand out chocolate bars, how about making a few batches of homemade cookies? Not just any cookies—ones that you’ve hand-decorated!
We know. Just the mere thought of doing this already has your head spinning. But we promise that if you try this recipe (and get your kids to join you on some of the decorating parts), not only will it be useful; you just might have a little fun too!
Oh just before you make your cookies, check out these awesome Halloween costumes! Pick yours up before they sell out!
If you are in need of some spooky decorations to match your spooky cookies, check out Windy City Novelties. And if you are looking for more costume ideas to match your theme this year, great places to look are Halloweencostumes.com and even Halloween Express! You are sure to find everything you need to make this year’s Halloween spooky!
Homemade Cookie Dough Ingredients
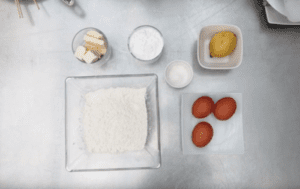
- 300 gr (2 cups) of flour
- 100 gr (1 cup) of sugar
- 100 gr (7 tablespoons) of butter
- 2 medium-sized eggs
- ½ of a lemon’s peel
- 2 gr of baking powder
Looking to make cookies but interested in getting some cookie mix instead? Stonewall Kitchen is the place to go!
Step 1:
I first pull out a big mixing bowl and put my flour, sugar powder, and baking powder in it. It’s also a good idea to add just a pink of salt too (make sure it’s just a little; if it was to be a teaspoon or more, we would’ve added it to the recipe!).
Step 2:
Next, I add the eggs and butter. Personally, I prefer to zap the butter in the microwave for 15-20 seconds so that it slightly melts; that makes it easier to blend in with everything else. Then I start to knead everything so that it turns into a dough-like consistency (maybe five minutes or so).
Step 3:
Once the dough is nice and smooth, I get out my grater and grate half of a lemon. It’s what will give the flavorsome zest. After the lemon peel is in the dough, I knead it some more.
Step 4:
Now that my dough is ready, it’s time to turn it into some cookies! On a flat surface, I put down some parchment paper. Then I sprinkle a little flour on it, put another piece of parchment paper on top of the dough and use my rolling pin to flatten the dough out.
Step 5:
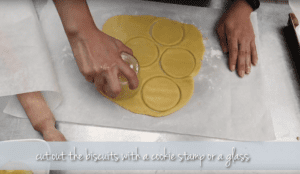
With the help of a cookie stamp (the drinking side of the glass can work too), I cut out circles with the dough.
Step 6:
I sprinkle “the circles” with a little more flour (just a little bit of it), cover the circles with parchment paper, and then flip them over. For me, this is one of the easiest and quickest ways to transfer unbaked cookies onto my cookie sheet.
Step 7:
Before the circles go onto my cookie sheet, I line the sheet with parchment paper too. Once all of the circles are on the sheet, I bake them at 180 degrees C (that’s roughly 350 degrees F) for about 20 minutes. Then I let them cool for 30 minutes.
Step 8:
With any leftover dough that I have, I use my cookie cutters to make creative designs like ghosts or emojis. (If you have a natural flair for art, you can use some of your utensils to make different shapes too!) Once I’ve baked those cookies too, I’m now ready for the fun part—the icing!
Homemade Icing Ingredients
- 45-50 gr (2 eggs) of egg whites
- 150 gr (2 cups) of powdered sugar
- 1 ½ teaspoon of lemon juice
- Food coloring
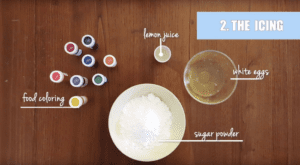
Step 1:
I get another mixing bowl and beat the eggs with an electric mixer while slowly adding in the powdered sugar.
Step 2:
After all of the sugar has been well-blended, I add the lemon juice.
Step 3:
Once my icing is made (see how easy that was!), I put about two-thirds of it into a container. With the rest, I evenly disperse the icing into a plate or bowl that has dividers. Then I add a different color of food coloring into each one. (Try not to add too much food coloring or it will make the icing very runny. Have fun mixing colors too; it will take you back to your own kindergarten school days!)
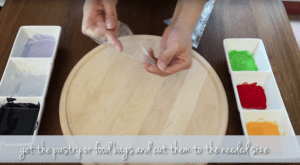
Step 4:
Although I prefer to use pastry bags, food bags will work too. I use them to put the different colors of icing into. (Make sure to clip the very end of the bag, at the corner. That’s how you can control how much icing comes out onto your cookies.)
Step 5:
With the container of icing that I set aside, I use that as the “base” for any cookies that I want to use white for. Then with the other colors, I create my different designs. (The main thing to keep in mind with this part is to be patient and to not add new layers of colors until you’ve allowed about 20 minutes for the first layer to “set”.)
After about an hour or so, I’ve got myself all sorts of cookies in different shapes and colors. Between my children and neighbor kids, everyone will be bragging about how much liked my Halloween treats. And that’s the best part!
Now that you have your cookies all set to go, maybe it’s time to figure out a Halloween costume if you haven’t already? Check out these awesome costumes! There are so many to choose from!
If you have yet to check out our Halloween activities article, here it is! And if you don’t have a Halloween costume just yet, check out our DIY costume ideas and get creative with your costume this year!
Looking for other decoration ideas for your cookies? Check out the video below!

