We hope you love the products we recommend! Just so you know, Trendy Mami may collect a share of sales or other compensations from the links on this page.
–
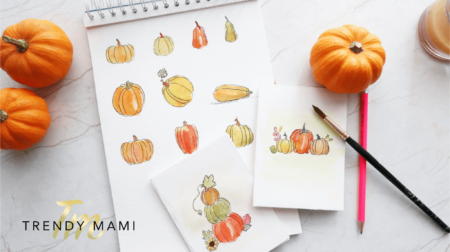
It’s time to get creative this spooky season with your very own pumpkin drawing! Even if you don’t consider yourself an artist, knowing how to draw a pumpkin is easier than you think. And it’s so versatile!
Why Learn About Pumpkin Drawing?
Pumpkins are the #1 decoration of the season! When you learn to draw a pumpkin, you can decorate everything with fall vibes. You can use this knowledge to make Halloween decorations for your home.
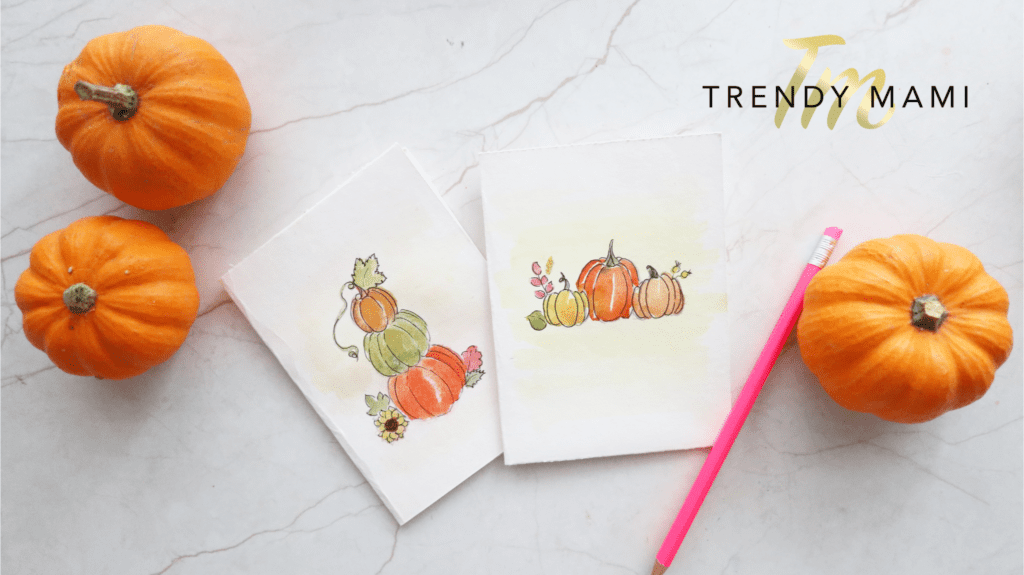
In addition, you might want to make printed T-shirts, greeting cards, or anything else that needs a festive touch.
What You’ll Need

Before we get started on the tutorial, make sure you have these materials on hand. You’ll need a notebook (the more pages for practicing, the better).
Then, get a pencil, watercolor paints, and a brush. We also recommend something round to trace, like a button or bottle cap, for the second pumpkin drawing method.
Make Your Own Pumpkin Drawing Instructions – Three Methods
Option 1:
- The easiest way to draw a pumpkin is to start with the center part of the pumpkin shell. Using your pencil, make one elongated oval shape.
- From here, we can start adding additional sections of the pumpkin shell. Draw another oval overlapping on one side of the first oval. You should have something that looks somewhat like a Venn diagram.
- Repeat the same on the other side.
- Now, we will erase the lines that are overlapping in the center part. Therefore, you will have a pumpkin shape with several complete sections.
- Add a stem and viola!
- Once you get the hang of this method, you might not need to draw overlapping ovals that need to be erased. Feel free to experiment with different pumpkin shapes too for more variety!
Option 2:
- If freehand drawing isn’t your forte, don’t worry. This tracing method can help you with your pumpkin drawing, too. Start by tracing your round item (like a button) with your pencil.
- Now, add the pumpkin stem to the top 1/3 section of the circle. Round the bottom of the stem for a more realistic look.
- From the stem, draw an arched line down towards the bottom of the circle.
- Keep repeating this line until you have drawn as many pumpkin sections as you want.
- If you want, you can round the corners on the top and bottom. This will give your pumpkin sections more depth.
- Using this technique can help you draw pumpkins of all shapes and sizes. You can also use this method to draw pumpkins on their side or sitting on the ground.
Option 3:
- This method is a little more advanced but still easy for beginners. Draw a trapezoid onto the paper. Make sure the longest section is at the top, and the smallest is at the bottom.
- Now, draw one curved arch to the left side of the trapezoid (connecting the top to the bottom). Repeat with the right side.
- Draw a wavy line across the top and the bottom of the trapezoid.
- Add a small step to the top.
- From the stem, draw more arched lines to create pumpkin sections.
- Erase the trapezoid once you have a pumpkin to your liking!
- If you want a taller pumpkin, start by drawing a taller, skinnier trapezoid! You can also use this technique to make lopsided pumpkins.
Coloring your Pumpkin Drawing

Don’t forget to add color to your pumpkins with watercolor paints. Watercolors are ideal because the ink can look like shading, which adds more depth.
Pumpkins can come in all colors, like burnt oranges, pale peaches, and even earthy yellows. Be creative when coloring! In addition to your pumpkin palette, make sure to have browns and greens to color the stems and leaves! If you do get too much ink on the paper, you can blot it with a paper towel or napkin.
Now that you’ve mastered the pumpkin drawing, what other creative ways can you decorate for Halloween? You can deck out your front porch with hanging skeletons or a spooky doormat.
Or you can make your own Halloween-themed lanterns (for the inside and outside!). All of these DIY projects are guaranteed to get you in the hair-raising spirit of Halloween!


