We hope you love the products we recommend! Just so you know, Trendy Mami may collect a share of sales or other compensations from the links on this page.
–
Why spend money on a generic greeting card when you can make a watercolor birthday card at home? Giving something handmade is much more personal – and it allows you to be as creative as you want!
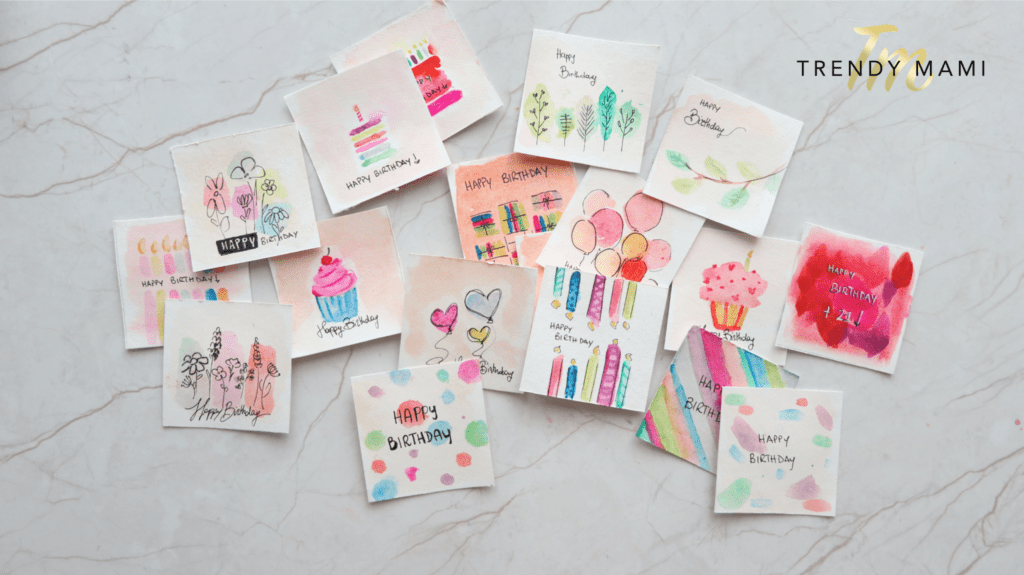
8 Watercolor Birthday Card Tutorials
We have 8 unique birthday card designs that you can make in just a few minutes. Make sure you have a watercolor paint palette, a paintbrush, Indian ink (or pen), and a cup of water.
We also recommend giving your birthday card a coat of color for the background. However, you can skip straight to the designs if you want to have a white background for your card.
Card #1: Cupcake Cards

1. For this adorably sweet birthday card, you’ll want a color for the frosting and for the cupcake base. Start by making a rough sketch of the cupcake with a pencil.
2. Mix your first pigment (frosting) with water. For a softer color, add more water to the pigment.
3. Now, lightly dab the ink on the top of your frosting. Repeat with the second color for the cupcake base.
4. Feel free to add other colors for sprinkles, cherries, etc. However, make sure the coat underneath is dry before doing so.
5. If there is too much water, use a towel or tissue to dab up the excess.
Card #2: Cake Cards
1. To paint a cake card, you’ll want different colors for each layer of the cake.
2. Start by painting the first layer of the cake. Now add a second layer, then a third. Continue until you have as many layers as you want.
3. If you’re going for an ombre-style cake, you might want the layers to blend together. You can do this by smudging the lines with a Q-tip.
4. If you want the layers to be separate, dab up excess water with a tissue or towel.
5. Once the layers have dried, go back in with an Indian ink pink to draw details. Make sure to add a candle and a happy birthday message!
Card #3: Candle Cards
1. A candle card is one of the easiest watercolor birthday card ideas to make. All you need are colors for the candle sticks and an orange or yellow for the flame. We like using at least two or three different colors for the sticks.
2. With your paintbrush, make one straight line starting from the bottom of the card.
3. Continue with the rest of the candles. You can make various sizes for each stick if you’d like. Wait for the ink to dry.
4. Dab a small amount of yellow or orange for the flame. Add a small flick on top to give it a flickering look!
5. Once everything is dry, you can return with a pen to add details to the candle sticks.
Card #4: Balloon Cards
1. For a balloon card, you can choose as many colors as you want. Start by making small circles on the card with one pigment. If you are using multiple colors, wait for the first color to dry before adding a different one.
2. Once dry, use a black pen to draw the balloon outline and string. We also love the look of making heart-shaped balloons too!
Card #5: Giftbox Cards
1. Although it may look complicated, a giftbox card is actually rather simple to paint. You’ll want a mix of different colors that will be used for the gift wrap. Each “box” will have 3 or 4 different colors.
2. Make sure to add a mix of vertical and horizontal lines for the giftboxes. We recommend waiting for each line to dry before painting the next (so the colors don’t bleed).
3. Once the boxes are filled and dried, use an ink pen to add the bows and birthday message.
Card #6: Flower Cards
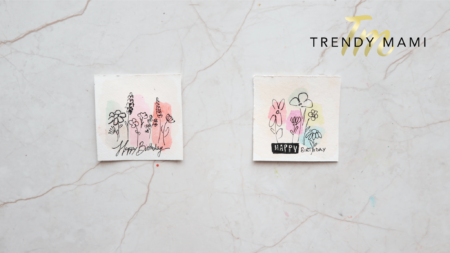
1. It’s so simple to make these abstract flower cards! Start with a variety of different colors, like pink, blue, orange, etc.
2. Now, just brush on different patches around the card. It’s okay if the colors bleed a little – this will add more contrast to the flowers.
3. Once dry, take your pen and draw petals, stems, and leaves over the paint.
Card #7: Leafy Cards
1. You’ll only need one green ink to make these leafy cards. To get the different shades of green, we’ll be diluting the ink with water.
2. Make your first leaf with the darkest shade of green (very little water).
3. Add a bit more water to each new leaf. Remember, more water results in a softer/lighter shade of green!
4. After the leaves have dried, you can use a pen (or brown ink) to add the stem.
Card #8: Abstract Cards
1. An abstract watercolor birthday card is a great way to express your creativity and imagination! There are no rules with this card, so feel free to let your mind do the painting. Use as many (or as few) colors as you want. Paint dots, stripes, shapes – you can’t go wrong with anything!
Make Beautiful Birthday Cards
As you can see, making a watercolor birthday card isn’t that difficult. But it’s something that we know your loved ones will appreciate receiving! If you’re ready to tackle another art project, then why not try hydro-dipping or acrylic pour painting? After all, making your own art is so much more satisfying than you might think!