We hope you love the products we recommend! Just so you know, Trendy Mami may collect a share of sales or other compensations from the links on this page.
–
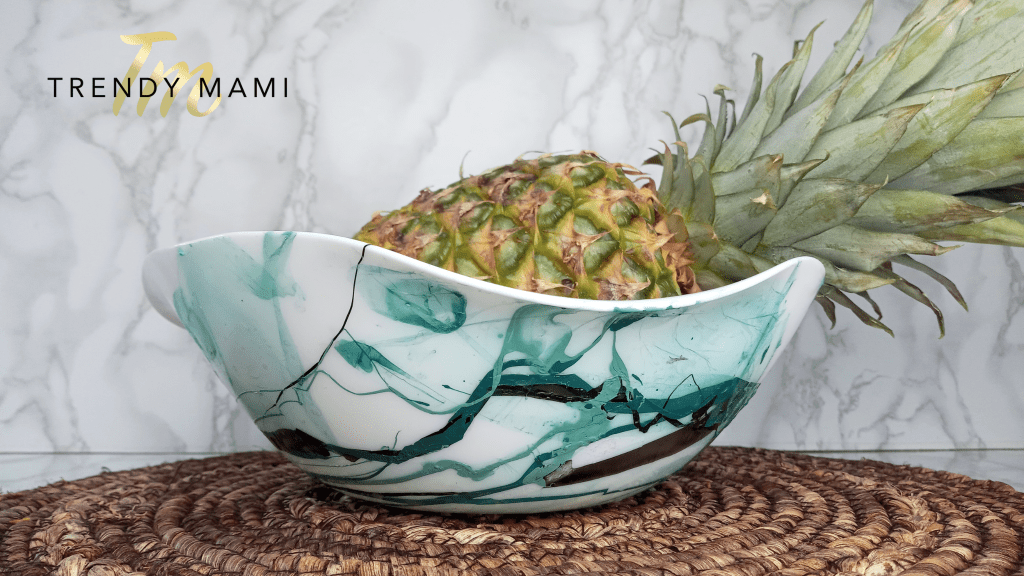
Looking for a fun craft to do this weekend that doesn’t require a lot of expensive equipment and practice before you can get great results? You’ve found it; marble painting is a lot of fun and a great way to give plates, bowls, and other ceramics a new look.
Marble painting, also known as hydro dipping, is where you drip paint (in our case, nail polish!) onto the surface of the water, swirl it around, and then dip an object into it so it becomes covered in the swirling pattern of the paint.
The good news is you likely don’t need to head out to the store before trying marble painting. All the materials are things you can find around the house, so spending a little money to try this craft is optional. Watch our video to see how it’s done and then use the information below to guide you through trying it for yourself.
How to Do Marble Painting (Try Hydro Dipping at Home)
Here’s What You’ll Need:
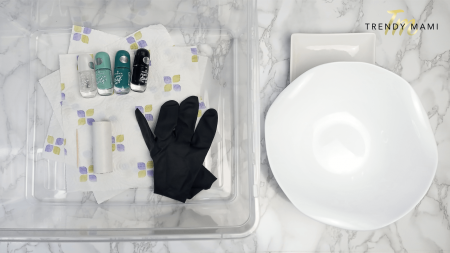
- A white plate, bowl, mug, or anything else you want to marble paint (we use a bowl and long thin tray in our video)
- A clean container that’s deep enough to submerge your chosen object(s) in
- Paper towel
- Nail polish (choose whichever colors you desire – a “liquid” brand like Essie works well)
- A toothpick
- A “tester,” which can be a thin piece of cardboard or a flat wooden stick
- Gloves
You can always find these products in Target!
Here’s What You Need to Do:
- Fill your plastic container with half warm tap water and half room temperature water (essentially, it should feel warm to your hand but not hot, about 50-90F). Make sure it’s full enough that you can completely submerge your chosen object without it touching the bottom
- Make sure you’ve got all the materials you need close by so you can move quickly. Lay out some paper towel or newspaper for your object(s) to dry on
- Do a test to get a sense of how much nail polish to drip, how much to swirl, and how fast you need to work
Here’s How to Do the Test:
-
- Drizzle your chosen nail polishes over the water
- Use a toothpick to swirl the colors around to create a marbling effect
- Use the tester by dipping it straight in and out of the water
- See if the results are something you like
- Clean the water by running a paper towel through it to pick up any unused color sitting on the surface
- If you didn’t get the results you’re looking for in step 5, repeat the process before moving on
Instructions (Continued):
- Put on your gloves
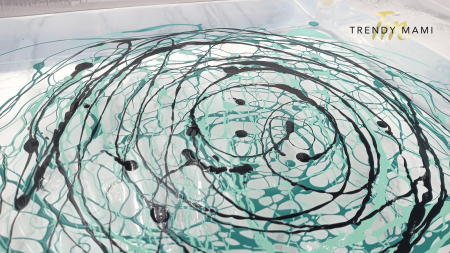
- Drizzle your chosen polishes across the surface of the water, then swirl them with the toothpick
- Hold your bowl (or another object) by the top lip and dunk it into the water, being careful not to let it touch the bottom of the container
- Pull the bowl straight out
- If there are large “blank” spots, you can dunk it again to add more marbling to the bowl
- Add more to the water or clean the water (depending on the colors you’re using) and then dip any other objects you want to hydro-dip
- Place the object(s) on some paper towel to dry
With that, you’re done!
Why Use Nail Polish for Marble Painting (Hydro Dipping)?
Nail polish is relatively cheap and durable, and there is an endless array of colors to choose from. They make the ideal “paint” for marbling ceramics for all these reasons. Just make sure you use traditional nail polish and not gel polish to get the best results.
Continue Crafting
We love marble painting; it’s simple and easy to do, fun to do alone, with girlfriends (or guy friends), or with your kids, and the results can last a lifetime. If you’re feeling crafty, why not try some of our other tutorials? Here are 3 you should try next (all with video guides):

